
VERTICES
Vertices is a free audio manipulation tool conceptualized by Andrew Huang and brought to life in collaboration with Cycling ‘74. It allows you to load any sound and drastically transform it using macro controls, randomization functions, and unique sequencing paradigms. It also includes an audio reactive visualizer whose look can be adjusted to taste.
Anything you create in Vertices can be instantly recorded to an audio file for further use in your DAW, other samplers, video content, etc.
Max (version 8 or above) by Cycling ‘74 is required to run Vertices. There is a free trial available on their site with the limitation that you can't save edits to the patch. This patch will not run with Max For Live, and needs the standalone Max application.
Receive the download link in your email.
Unsubscribe anytime.

HOW TO USE VERTICES
MAIN INTERFACE

Begin by clicking Folder and choosing a folder on your computer that contains audio files. You will then be able to select one of them via the dropdown menu. You can also use the up and down arrow buttons to navigate through the samples in the folder.

You can click and drag to select a specific portion of your sample, or use the SEQ toggle to turn on its sequencer to have sample selection automated.
RATE controls the playback speed of the audio. It has its own sequencer, and additionally can be connected to the MACRO knob.
Sequencers and macros are covered in detail further down the page.

Toggle keyboard keys on and off to add them to the pool of notes available to the pitch sequencer. The pitch sequencer does not set absolute values but responds to your current note selection—the lowest selected note will play when the pitch sequencer's output is 0 and the highest selected note will play when the pitch sequencer's output is 127. The keyboard notes themselves are also not absolute pitches, as what you hear will be dependent on the contents of your sample and the RATE setting.
Note that no sound will be generated unless you have keys selected and the pitch sequencer is on, or Max is receiving MIDI from a connected external source.

Sample playback is passed through a standard ADSR envelope and then a reverb. Adjust the envelope and reverb parameters with the sliders, use the M button to link a parameter to be controlled by the MACRO knob, or use the X button to engage an individual parameter’s sequencer. The arrow buttons ↗ open the sequencer subwindows.

There are 13 slots for storing presets. Shift-click a slot to save your current settings there. A slot that already has a preset stored will be a different color, and can be loaded with a click.
SEQUENCERS


Most parameters have a powerful dedicated sequencer. These can be turned on or off with buttons labeled either SEQ or X, and can be viewed by clicking any ↗ or OPEN ↗ button. All the sequencers operate in the same way:

Click an X to turn a step on (yellow) or off (grey). Note that steps that are on still may not fire if the PROBABILITY setting is lower than 100.
The 16 sliders set the values of each sequencer step. These values can be further scaled by the RANGE controls at the bottom right of each sequencer.
Beneath each slider is a circle that will blink yellow to indicate when that step has fired.


PROBABILITY sets the % chance that a step that is on (yellow X) will trigger each time the sequencer playhead reaches it.
The sequence output is scaled by the RANGE settings. Left knob = lower limit, right knob = upper limit, and the current output value is displayed below. Fun tip: If you set the lower limit higher than the upper limit, values will be inverted, which can create interesting sequence variations!
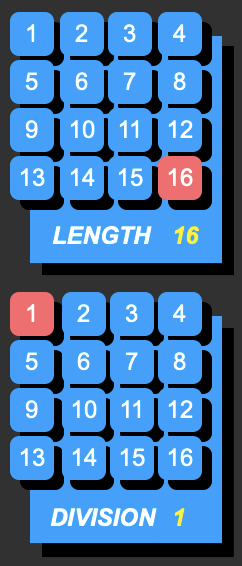
The LENGTH buttons set the last step of your sequence. Sequence lengths can all be independent of one another.
DIVISION is a clock divider: It sets the number of metronome beats that must pass before the sequencer advances to its next step. (The default setting of 1, therefore, matches the global BPM.)

The ALL TRIGS button turns on all steps. Note that steps that are on still may not fire if PROBABILITY is set lower than 100.
The RANDOM panel provides buttons for randomizing individual aspects of a sequencer. The TR SEQ OUT button is a favored combination of Andrew’s, simultaneously randomizing which steps are on, all step values, and the output range.

A sequencer’s title bar also acts as an on/off button. Below it is a bar of preset slots. Shift-click a slot to save your current sequencer settings there. A slot that already has a preset stored will be a different color, and can be loaded with a click.

GLOBAL CONTROLS
On/Off. Turning Vertices off will instantly disable all audio.
Clicking Record will immediately start recording your output to an audio file, and prompt you to name it and select a location on your computer where it should be saved.
Click TUTORIAL to be brought to this webpage.

DRY controls the level of the pre-reverb sound, while WET controls the level of the reverb. This was included so the overall reverb volume could be dialed in even if the VERB OUT level was being controlled by its sequencer or the MACRO knob.


Set a BPM by clicking and dragging the number. This value can also be linked to the MACRO.
The MACRO knob can control the value of multiple parameters at once. Link a parameter to the macro by using the buttons labeled M or MACRO. (Note that when not engaged a MACRO button’s label changes to read UNLINKED.) A parameter can be controlled by its sequencer and the macro knob at the same time, however, changes to the macro value will take precedence—other than the occasional glitch, which should be embraced. 😄
MACRO also has its own sequencer. When this is engaged, a toggle button will appear beneath it which allows you to set whether macro values JUMP (change immediately) or GLIDE (gradually move to the next value). If GLIDE is selected, two additional controls appear: A slider which lets you set the glide speed, and a toggle to link the glide speed value to the macro!

The GLOBAL SEQ CONTROL panel allows you to change all sequencers’ lengths, divisions, probabilities, low output limits, and high output limits at the same time. It can lead to some drastic changes—note that there is no undo! The ALL TRIGS button turns on all sequencer steps, but note that some steps still may not fire if a sequencer’s PROBABILITY is set to less than 100.

The GLOBAL RANDOM panel contains buttons that will randomize aspects of all sequencers at once:
LEN: The lengths of all sequences.
DIV: The clock divider settings of all sequences.
TRIG: The on/off state of all steps in all sequences.
SEQ: The step values in all sequences.
PROB: The probability settings of all sequences.
OUT: The low and high output ranges of all sequences.
TR SEQ OUT: A combo button for simultaneous randomization of active steps, step values, and output ranges.
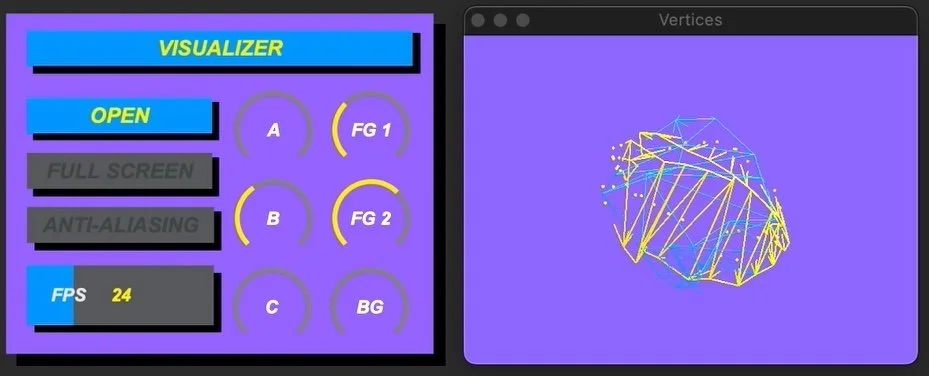
An audio-reactive visualizer lives in a resizable floating window and can be controlled from the VISUALIZER panel.
A complex set of parameters and value ranges have been mapped to respond to Vertices’ outgoing audio, but broadly the visualizer activity is based on volume and reverb amount as well as the balance of low and high frequency content.
VISUALIZER

There are buttons to open and close the floating window or make it full-screen.
Turn on ANTI-ALIASING to smooth the edges of the animation, or turn it off to lighten the CPU load. FPS sets the framerate of the video—higher settings will increase the CPU load.
Use knobs A, B, and C to change elements of the visualizer’s style. Foreground and background colors can be set with the FG and BG controls.

AUDIO EXAMPLES
